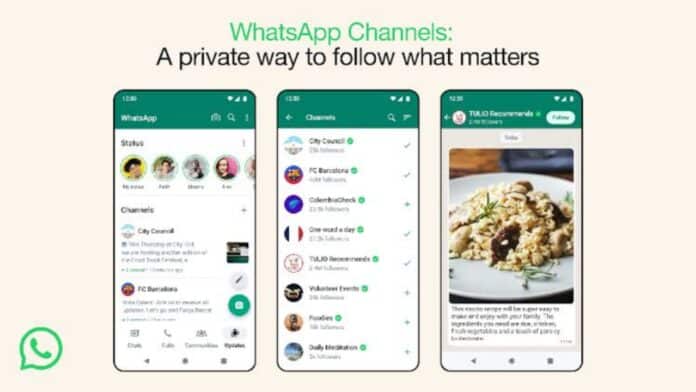
It began as just another texting app and has now grown and transformed itself into a vibrant renowned communication platform. WhatsApp has recently introduced a new feature called WhatsApp Channels and this article is going to give you a step-by-step guide on how to create WhatsApp Channels.
Before we create a WhatsApp channel, You need to see if your WhatsApp is asking for an update, Let’s follow this process:
Update Your WhatsApp
Updated versions have the latest features and bug fixes. When registering your phone you need to use the latest version of WhatsApp or the registration will fail.
also read: How to Create a WhatsApp Channel: A Comprehensive Guide
How to manually update WhatsApp on Android
- Tap on ‘Google Play Store
- Click on the ‘Hamburger Menu’
- Tap on ‘ My Games and Apps
- Next to WhatsApp Messenger, tap on ‘Update’
How to manually update WhatsApp on iPhone
- Open Apple Store
- Tap on your profile picture
- Scroll down to Updates, then tap ’Update’ next to WhatsApp Messenger
- Wait for the updated installation to complete
How to Create a WhatsApp Channel
Step 1: Open WhatsApp
Open WhatsApp on your device.
Step 2: Access Your Channels Tab
Tap the ‘Channels’ tab in your Chat list.
Step 3: Create a Channel
- Tap on ‘Create Channel’
- Select a name and a profile picture for your Channel
- Rite a brief description so that users can understand what your Channel is all about
Step 4: Invite Subscribers
You can now begin inviting subscribers to your Channel. You can do this by sharing your Channels link or QR code on social media, your website, or with your friends and family. Subscribers will be able to join your Channel with just a single click.
Step 7: Start Sharing Content
You can begin sharing updates, messages, and news with your subscribers. You can send text, videos, images, and much more. Ensure to keep your audience engaged with relevant content.
How to delete a WhatsApp channel
WhatsApp Channels are gaining popularity as a means of communication. However, there may come a time when you need to delete your channel.
In this article, we’ll walk you through the straightforward process of permanently deleting your WhatsApp channel, ensuring your Indian audience can follow along with ease.
Why Delete a WhatsApp Channel?
Sometimes, circumstances change, and you may want to switch your content focus or stop updating your channel. Deleting the channel is a permanent solution to these situations.
Permanent Deletion: What You Should Know
Deleting your channel means that you won’t be able to make updates from it ever again. Followers will still find your channel but will see a system message indicating that your channel was deleted.
However, your past updates will still be accessible from their phones. Non-followers, like viewers, won’t be able to see your channel or updates, and it won’t appear in search results. New people can no longer follow your channel, and your sharing link will no longer work.
Step-by-Step Guide to Delete Your Channel
1. Accessing Your Channel
- On mobile, go to the “Updates” tab.
- On the web, navigate to the “Channels” page.
- Find and tap or click on your channel to open it.
2. Initiating Deletion
- Tap or click your channel name.
- Select “Delete channel.”
3. Confirming Deletion
- Enter your phone number to confirm.
- Tap or click “Delete.”
4. Confirmation of Deletion
After successfully deleting your channel, you’ll see the message “You deleted your channel” in the “Updates” tab.
WhatsApp Channels offer exciting opportunities, but if you ever need to remove your channel, this guide simplifies the process.
Always remember that channel deletion is permanent, so ensure it aligns with your content strategy. Follow these steps, and you’ll be able to delete your WhatsApp channel hassle-free.
WhatsApp Channels Restrictions/ Guidelines
By delivering a groundbreaking WhatsApp channels feature, Meta-owned WhatsApp has set some important guidelines. It is to provide users with enhanced privacy and security. We’ve covered all of them below.
- WhatsApp Channels are one-to-many broadcast services separate from private messaging.
- Admins should provide a title reflecting the content.
- Avoid excessive or low-quality updates to prevent follower dissatisfaction.
Prohibited Content:
- No sharing of illegal content or engagement in illegal activities.
- Avoid content that poses harm to individuals or public safety.
- Strictly refrain from fraud, impersonation, or deceptive activities.
- Keep content age-appropriate and avoid explicit or violent imagery.
- Commercial sexual services and regulated goods are not allowed.
Violation Detection:
- WhatsApp employs automated tools, manual reviews, and user reports.
- Users are encouraged to report violations.
- Legal orders from authorities may also trigger review and action.
Possible Actions for Violations:
- Admins may receive warnings for guideline violations.
- Updates may be suspended or removed.
- Violating content in profile fields may be taken down.
- Invite links can be revoked.
- Channel suspension and admin bans are possible.
- Additional actions may be detailed in the Supplemental Terms of Service.
These guidelines emphasize WhatsApp’s commitment to a secure, respectful, and compliant environment within WhatsApp Channels. Admins and users share responsibility for maintaining these standards.
Wind Up
In this ultimate guide, we learned about the simple steps one should take to manage and create WhatsApp channels, Delete WhatsApp channels, and the guidelines WhatsApp wants users to follow while using these features.
With features like these WhatsApp continues its journey to serve high-quality communication service to all the whole community.
Share your view about this ultimate guide to WhatsApp channel in the comments section below.


Welcome